Showing posts with label Game-Hacking. Show all posts

Game Cheating Part 2


Greetings to the best hacker in the world. Today, I am going to be writing Game Cheating Part 2

Today, what I want to cover will be about:

0x1. Nopping

0x12. Coding a simple NOP code.

0x2. Internal Hooking

It is recommend to read my first blog about Game Cheating part 1, because this blog will be the continue part.

I will also suggest you to look at the assembly part which is not written in my page, but you can check it out on Internet.

Let me get started with over-viewing the game. The first step is nopping the bullet amounts of the user.

Nopping

First of all, let me quick overview what NOP means. NOP or well (No Operation) means in Assembly, that it does not do any implementation into our code. In some cases, no-op instructions are used for timing purposes. They can also help to deal with certain memory issues, or work in conjunction with a group of other instructions to facilitate some kind of end result.

Please follow the instructions. After the instruction part, we will be automating into our code. It is always worth to learn and enhance your programming skills.

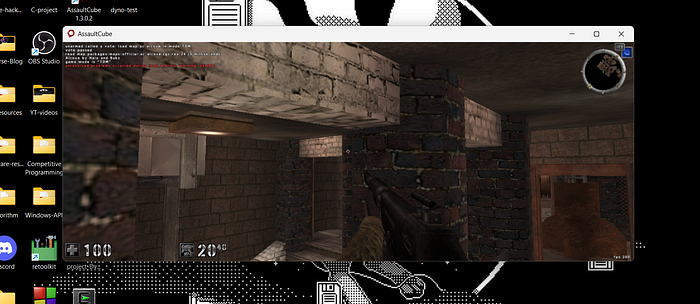
  1. Start your game.
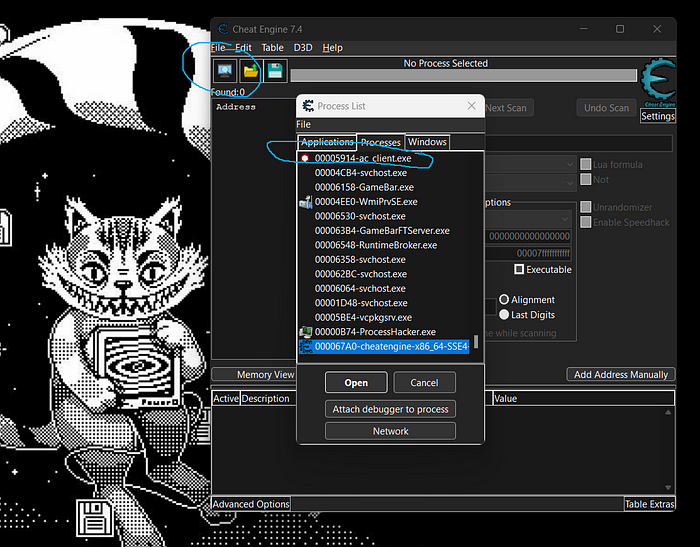
  2. Start Cheat Engine.
  3. After starting two programs, please make sure that you attached the game to Cheat Engine.
  4. When you attached the game, make sure that you shall look for the memory address of user’s bullets.
I found the memory address of my bullets.

Please right click and go to >> “find out what writes to this address”
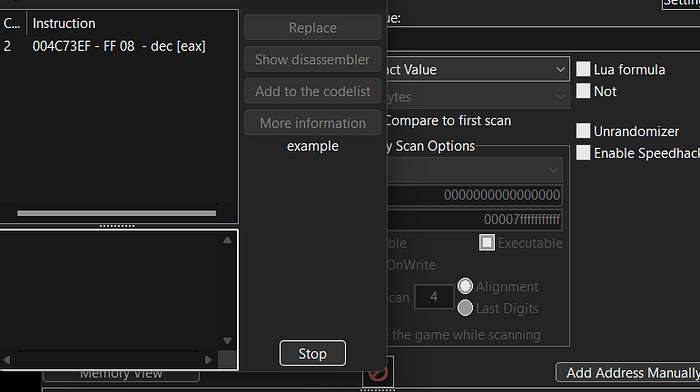
Debugging has started… Now, we are able to see when we shot once to the wall , the instructions of the code.
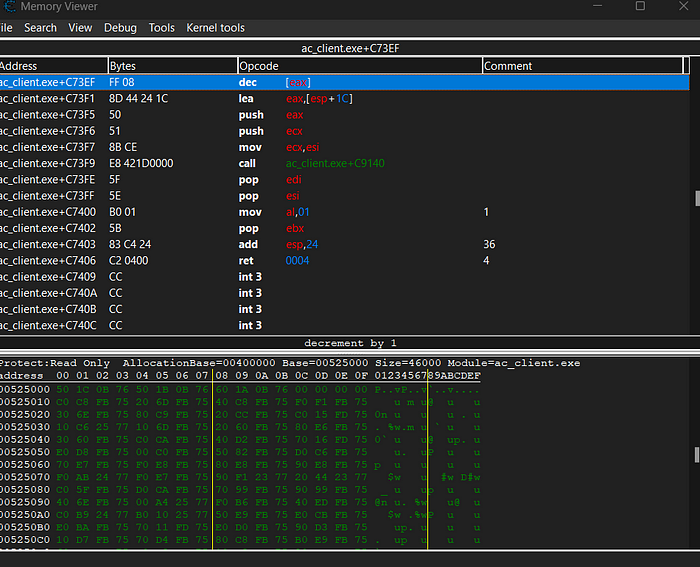
Now, we are going to disassemble our code to make it more understandable.

This is predictable because when we shot once, that means that it decrements 1 bullet from my weapon thus “dec” instruction will be in the game.
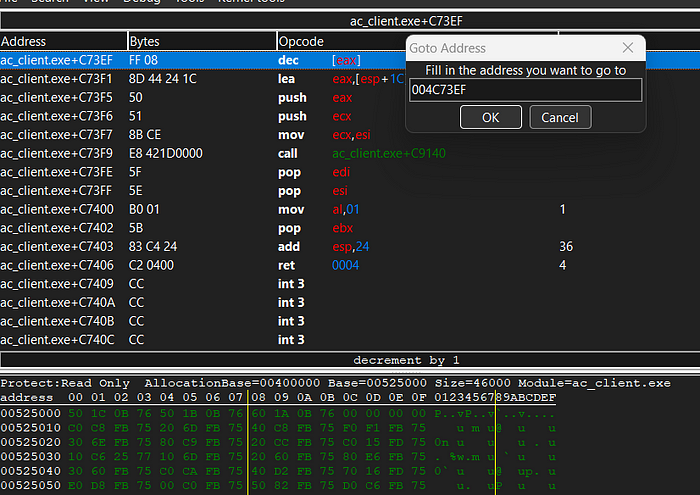
We are seeing that it does have 2 bytes, we can also check the current memory address to do so ; CTRL + g will be useful. We are also seeing that its a pointer address.

This information will be useful, because I am going to implement those information into my code.
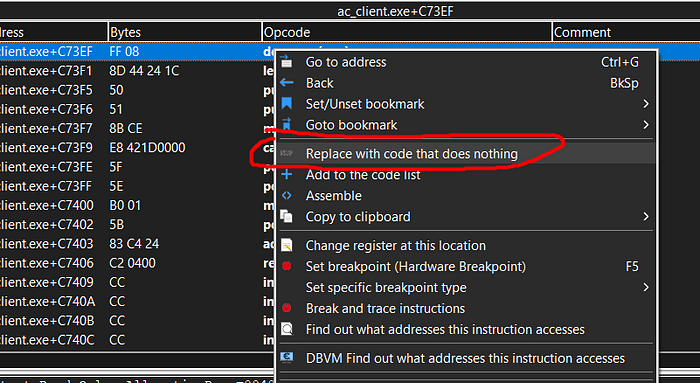
If you click onto “replace with code that does nothing” this means just “NOP”
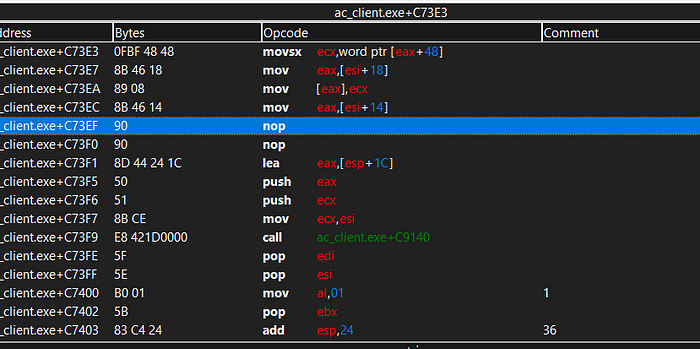
As you can see we were able to NOP the address.
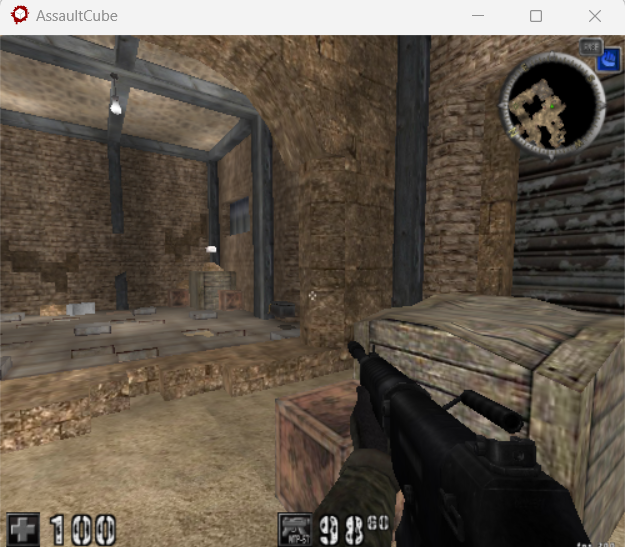
You are not able to see, but when I am shooting the bullets are not decreasing because we just set as “NOP”

To learn and practice, we are going to write a simple code which automates it.

Coding a simple NOP address

I would recommend you to learn C++., if you are into reverse engineering and malware analysis. Let me get started to write a simple script.

First of all, we should understand that the code has been protected thus we need to manipulate it through “virtual-protect” API

To get more information about Virtual-Protection you can check: https://learn.microsoft.com/en-us/windows/win32/api/memoryapi/nf-memoryapi-virtualprotect

Virtual-Protection; Changes the protection on a region of committed pages in the virtual address space of the calling process.
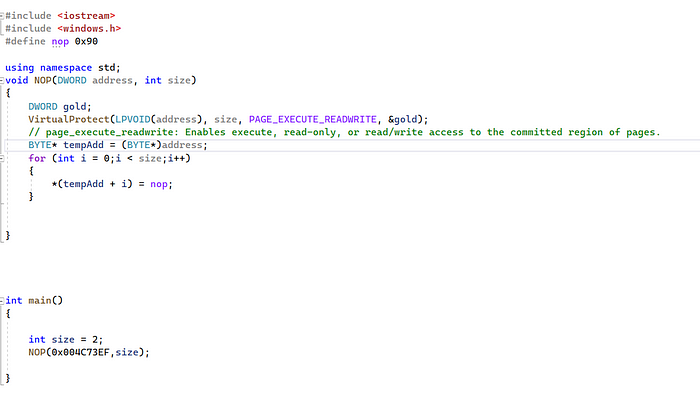
First of all, let me explain the source code.

  1. We should define “NOP” as x90 this means that instruction will be changed to nop operator.

2. As usual, we can create a function called NOP which holds the address and the size of bytes.

3. Virtual-protect will be important because we are not allowed to modify the source code, which should be able to use this API.

4. BYTE* = std::byte is a distinct type that implements the concept of byte as specified in the C++ language definition.

5. Gold does actually store the old protection previously.

Please do not forget to select > properties> and run as .DLL
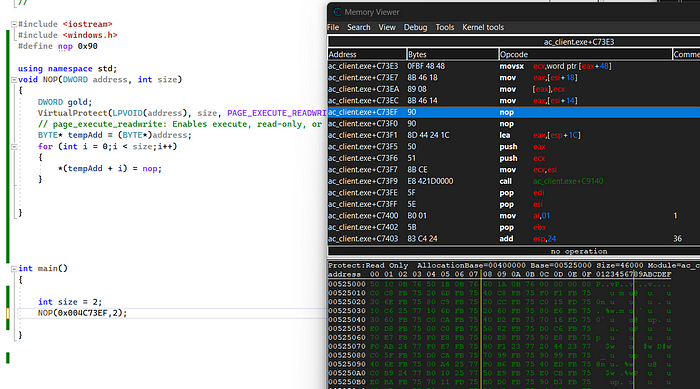
Internal Hooking

Before illustrating the internal hooking part, let me introduce about API hooking.

API hooking is a technique where you can instrument and modify the API flow. Most EDR/AV are being used to determine the functions whether is malicious or not. We will be able to analyze and hook the functions.

Hooking can be used to introspect calls in a Windows application or can be used to capture some information related to the API Calls.
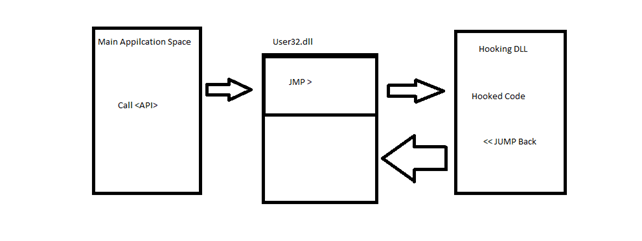
https://resources.infosecinstitute.com/topic/api-hooking/

We can use trampoline method to modify and instrument the functions.

  1. First of all, as demonstrated above, it calls APIs from main application space
  2. Afterwards it will go into user32.dll to be jmped. (Windows management functions for message handling, timers, menus, and communications.)
  3. When the 2. phase is being done, then the code will be hooked and returns back to user32.dll.

Internal Hooking Code Instruction

First of all, let me start the game as well as Cheat-Engine.

Let me show the code before starting the process.
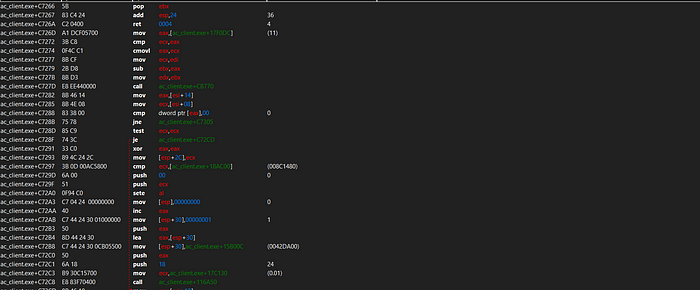
Awesome being disassembled code is given.

  1. Try to understand the functions (GOOGLE will be useful)
  2. After understanding the function calls, we need to implement our code to be called.
  3. We are going to use assembly language here…

We are going to manipulate these two parts…

Let me write a function called “FunctionManipulation”

Before writing the function, we will kick off with “_declspec(naked)” which means: the compiler generates code without prolog and epilog code. You can use this feature to write your own prolog/epilog code sequences using inline assembler code. It does not work on x64..
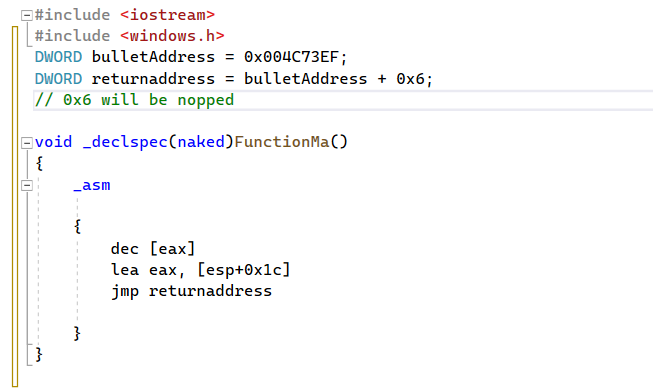
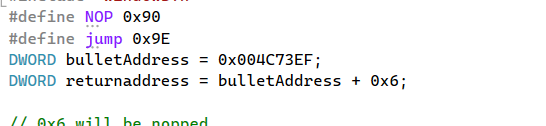
We will be manipulating the function. We need to delete 5 bytes from the code and only 0x6 will not be deleted, because this byte will call another function.

  1. Bullet address is known = 0X004C73EF (the memory address)
  2. return address is known = bullet address + 0x6 (the return address of 0x6)

Now let me create a hook function
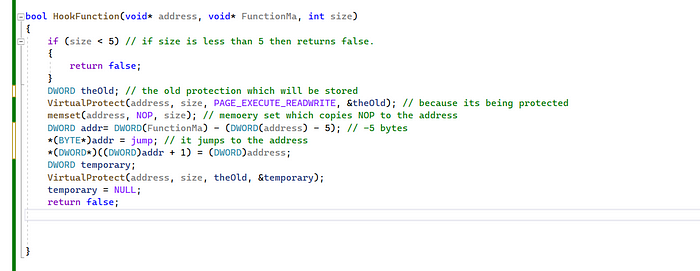
  1. If the size is less than 5, it returns false from that function.
  2. We need to declare the old protection which will be stored to the new VirtualProtect.
  3. VirtualProtect is declared (the address, the size, and the protection)
  4. memset; sets the first count bytes in c
  5. NOP is declared as “0x90”
  6. jump is declared as “0x9E”
  7. Our current address is equal to the new address with +1 byte
  8. We should create our temporary protection to restore to virtualProtect.

Summary

Thanks for reading this blog. I will be going to learn more such techniques and writing to my blogs. Please stay tuned for more awesome hacking stuffs. Game cheating part 3 will be shared in soon.

Ahmet Göker | Reverse Engineer Jr

Game Cheating part 1


Greetings to the best hackers in the world.

Today I want to illustrate Game hacking technique to Info Sec people. This blog will be about changing the bullet value of the game. I hope you will like and subscribe my blog-page. This blog shall be written only for educational purpose only do not use for any malicious events. It is recommend to learn cpp pointers, because you can be overthinking what such tasks and offset does. It is important to know at least 1 programming language as well as WINAPI32 to understand the methodology

Cheat Engine

First of all, let me get started to demonstrate what Cheat-Engine is. Cheat-Engine is a tool which scans the memory address of a game. Most crackers do know what this tool does, and it is worth to check this tool if you want to enhance your RE,cracking skills. This tool allows you to access data stored in your computer’s memory and make changes to that data. I will going to show a part of the functionality.

You can download here: https://www.cheatengine.org/ You can also watch some tutorial to have to have a better understanding.

I am going to show you step by step how we can manipulate the game.

I have downloaded this game because it seems that this game does not have memory protection. You can always use your memory protection technique from cheaters like me:)))

You can also check the source code of Cheat Engine: https://github.com/cheat-engine/cheat-engine

I will check this later. There shall be a written blog about code base analysis of cheat engine.

Game-Mod with cheat-engine

First of all, I will be going to modify the bullet value, but it would be useful to understand what the process are:

  1. start the game, and wait till the screen is being popped up.

Awesome this means that the game is running. Let me check the PID of this game.

Awesome, PID : 22804

2. We know that the game is running and the PID is being popped up as well. The second thing that you should is activating cheat-engine

Click left at the end of the window, and select → av_client.exe

This means that we attach the game to the memory reader:)

3. After the attach process, we should concern on the amount of bullets

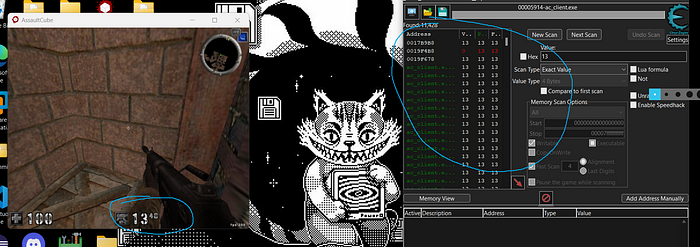
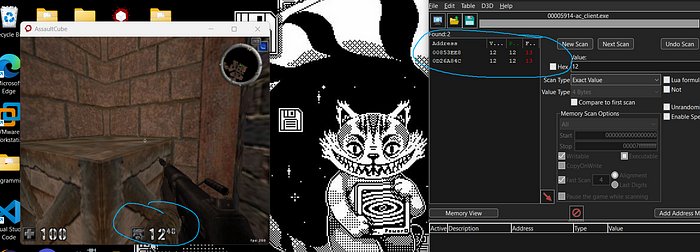
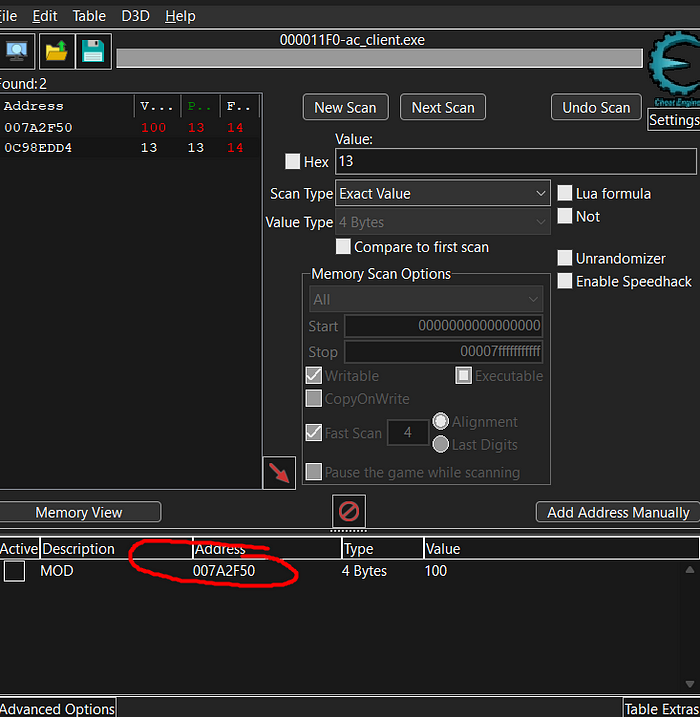
I shot 7 bullets to the wall, now there are 13 left. This is important, read this part carefully.

Go to → value, and type 13. This means that all memory addresses will be shown onto the screen. With that memory address we need to search the right memory address to being able to manipulate the value.

After typing 13, shoot 1 bullet and then search it again. Now we have 12 left. Type 12 to the value bar. The reason is that we need to look the right memory after all.

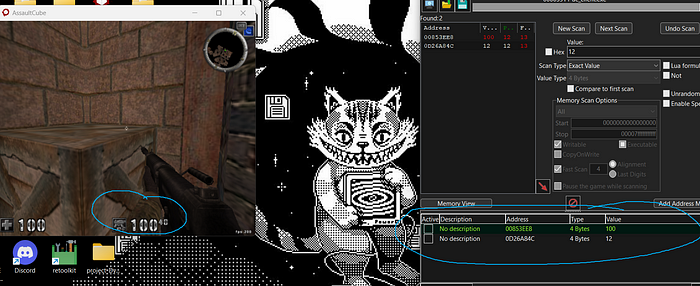
Awesome 2 memory addresses are being appeared. I reckon one of them is the right memory address which can be manipulated.

Awesome the first memory address looks that its right one.

“00853EE8" this our target memory address, but there is 1 problem. The problem is that when we restart the game the memory will be changed and… the bullet value will be the same. Do not worry “Game hacking part 2” shall be appeared in my blog page. We will be able to change the value of this game for ever…

Oke, The most important is coming… We should always be able to check the pointer of the bullet value.

Finding the pointer of bullets

We can always change the value of bullets. We know that we are REs and we love challenging. Now, let me scan the pointer of the memory address

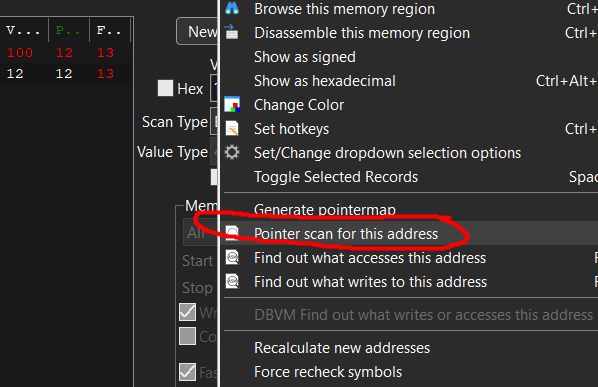
Right click onto your mouse and click “pointer scan for this address” this will be great when we want to implement to our code.

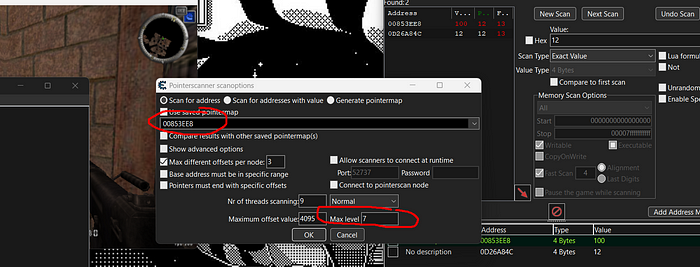
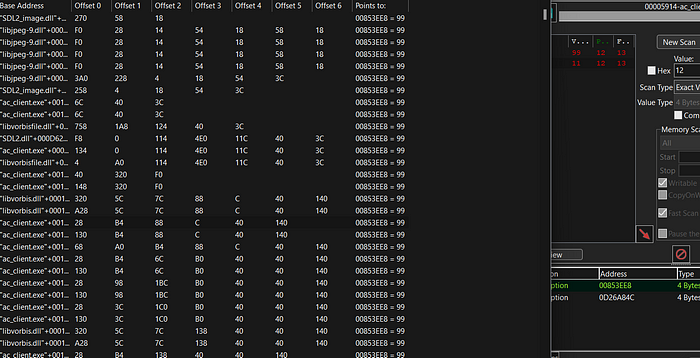
As you can see our memory address. You can increase the offset or decrease its up to you. I recommend you to set 6 or 7..

Awesome all pointers are appeared to me. Now we are not always lucky to choose the right pointer address of it. After checking and accomplishing that its true lets go further….

Awesome this is the right one.

Oke.. after the process now I am going to code this manually with WINAPI32 internal.

Coding and Hacking time

This part of my blog would be interesting. It is will worth to enhance your programming skills, because not always your standalone program should work.

You can check the docs of Microsoft -> https://learn.microsoft.com/en-us/windows/win32/apiindex/windows-api-list

After learning progress come back..

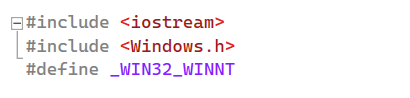
We need to include “windows.h” and defining the “_WIN32_WINNT” this means that we are working on windows 10 or above.

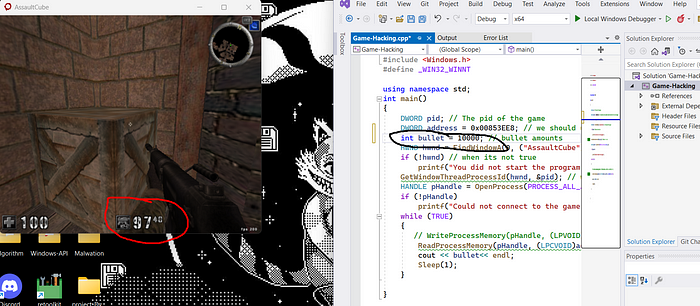
  1. We should define “pid” process identity of the game.
  2. We always should choose “address” // the memory address

3. When the game has been started, this is the amount of the bullet.

HWND → to retrieve the window handle for a window.

This is important when the program is able to find the window of the game // When the program could not find the window → error message

When its found do the manipulation process.

GetWindowThreadProcessId → Retrieves the identifier of the thread that created the specified window and, optionally, the identifier of the process that created the window.

OpenProcess -> Opens an existing local process object.

If the handle is not true → could not connect to the game

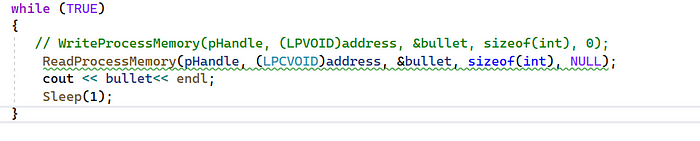
When it is true we are going “ReadProcessMemory” to A handle to the process with memory that is being read. The handle must have PROCESS_VM_READ access to the process.

You can read the docs for more information.

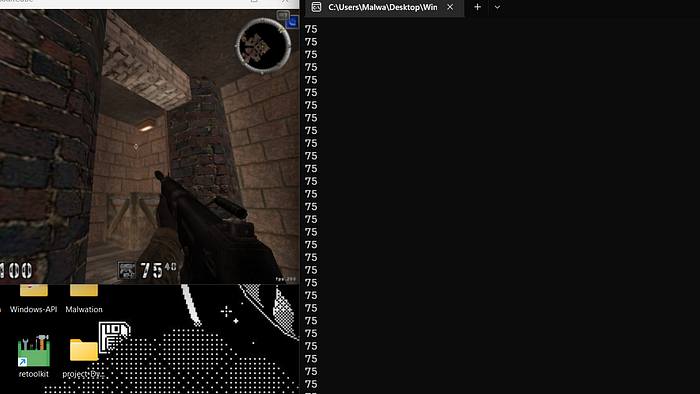
After, it will show the bullet amount lets give try…

Bullet amount → 97

Lets give a try……

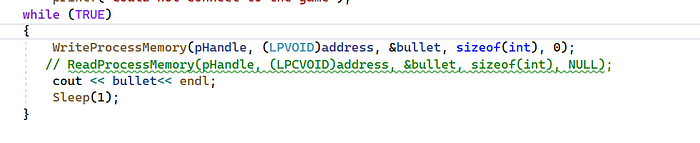
We can make it more nicer,but as a short demo it will be great. Now, I am going to write it with “WriteProcessMemory”

WriteProcessMemory → Writes data to an area of memory in a specified process. The entire area to be written to must be accessible or the operation fails.

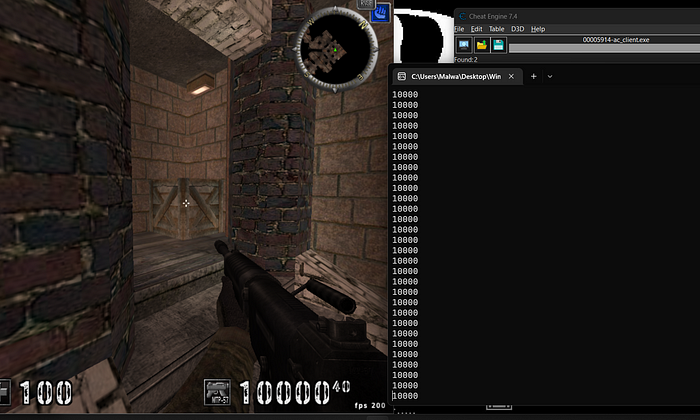
Awesome. We have successfully cracked the game.

Summary

We are done of course.. In the part 2, we are going to use DLL injection technique.

You can follow me on:

LinkedIn: https://www.linkedin.com/in/ahmetgoker

Twitter: https://twitter.com/TurkishHoodie_

Instagram: https://www.instagram.com/d4rkc0d3r/